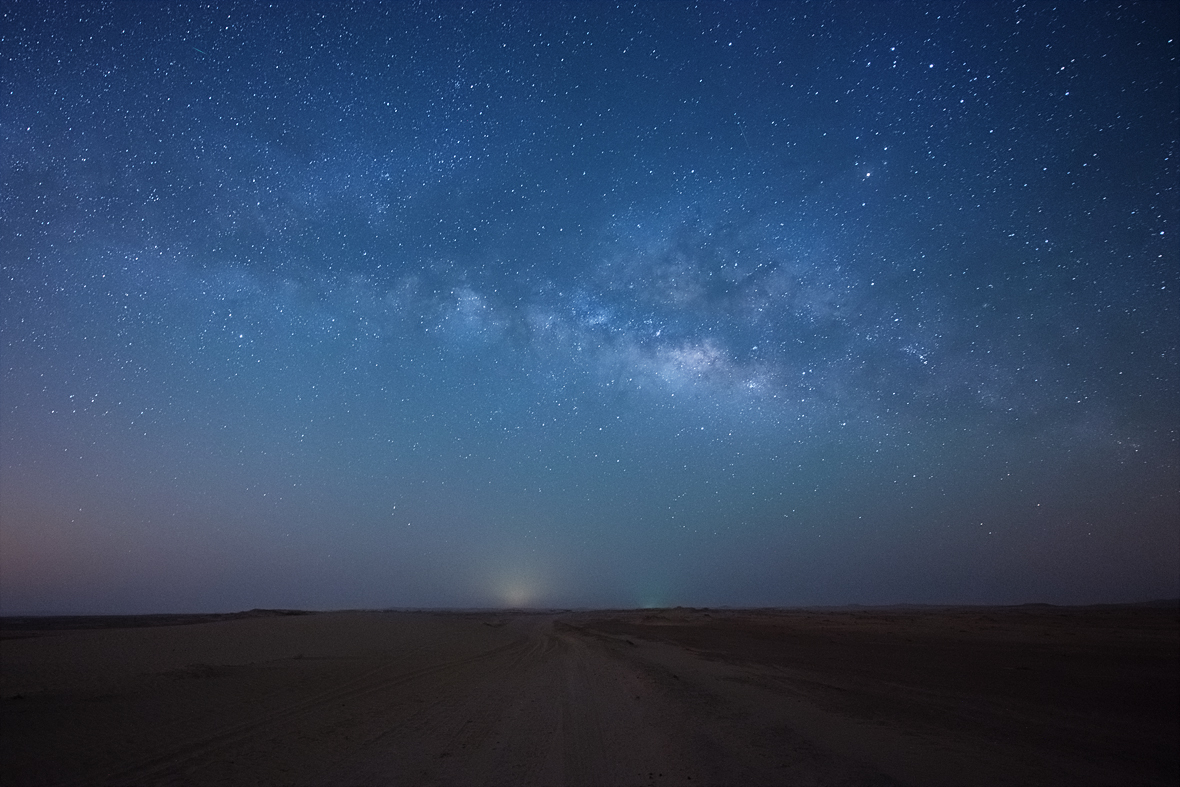
Shooting stars
On Friday night, probably most photographers based in Dubai were out and about in the UAE deserts, setting up to photograph the much-hyped Camelopardalids meteor shower. I’ve read at least a couple of very misinformed articles in the local press about how this was guaranteed to be the best thing since sliced bread and although there was a good chance of this being a fairly strong meteor shower, there were by no means any guarantees. The main reason for this is that unlike the Perseids yearly meteor shower in August, this one is more of a one in a hundred years type of event and was never observed before. Add to this the fact that the peak for it was supposed to be fairly late, almost at sunrise Dubai time, chances were that we won’t be seeing the predicted hundred meteors an hour.
Having said all that, I did decide to out and make an evening of it. Knowing that the desert around Dubai will be packed with people doing the same thing (I even heard of slow traffic around the Bab Al Shams area that night), I planned on driving towards Liwa in the Empty Quarter desert towards Saudi Arabia. I made my way through the salt flats and made it quite far into the desert (at some point I was picking up Saudi Telecom signal on my phone, so I’m not quite sure if I crossed any borders). I found a fairly high spot up on the dunes and as I waited to get completely dark outside, I realized I made a bit of a mistake. Because the dunes in the Empty Quarter are very high, instead of having complete darkness, you actually are seeing quite a lot further, which increases the light pollution on the horizon. So after a couple of shots which weren’t very successful I decided to make my way down, keeping an eye for the darkest spot I could find.
I came across a sandy road looking towards the East (not the correct direction for this particular meteor shower which was supposed to come mostly from the Camelopardalis constellation direction which was North), but I figured I’ll set up there and set the camera to take lots of 30 seconds long exposures hoping in some of these I’ll be catching some meteors. I had the camera shooting for about 2 hours and unfortunately there were very few “shooting stars” during that time, with two of those events present in the image above. If you’re struggling to find them, one is in the top left corner (fairly short streak of light) and the other is one third from the right, just above the main part of the Milky Way (very faint and the trail runs in an almost top to bottom direction).
In terms of how to photograph something like this, it’s a fairly simple process. You need to switch your camera into manual focus and then focus on infinity. Once you’ve taken a few short exposure test shots at the highest ISO your camera will allow to test if your focus, exposure and composition are correct, you will need to work backwards from there to the lowest ISO that will allow you to take a 30 seconds exposure. For example, if your test shot was at ISO12800, 8 seconds, f2.8, then to get to 30 seconds you will be able to drop 2 stops from your ISO (from 8s to 15s is 1 stop and from 15s to 30s is one more stop). That means your final shot will be at ISO3200, 30 seconds, f2.8. The reason why you want to not go longer than 30 seconds is because that’s about the maximum exposure in which the star movement will not start to show. Also, the shorter your exposure (and the higher the ISO) the brighter any meteor might look. If you want to ignore the meteors and photograph star trails instead, then you go all the way to ISO100 to get the best quality out of your camera and increase the exposure accordingly. In the example above, taking the ISO down to 100, will loose you another 5 stops of light from ISO3200, which means you will be able to increase the exposure time to 15 minutes (30 seconds -> 1 min -> 2 min -> 4 min -> 8 min -> 15 min). If you want even longer star trails, you can change your aperture from f2.8 to f8 which looses you another 3 stops of light allowing you to take the final exposure to 2 hours (15 min -> 30 min -> 1 hour -> 2 hours). After that all you need is a lot of patience and good batteries for your camera to complete the 2 hours.
I hope this small tutorial helps and if any of it is confusing, let me know in the comments.