It’s been a long time since I’ve done a behind the scenes post so I thought it was about time to take you again through another interior shoot.
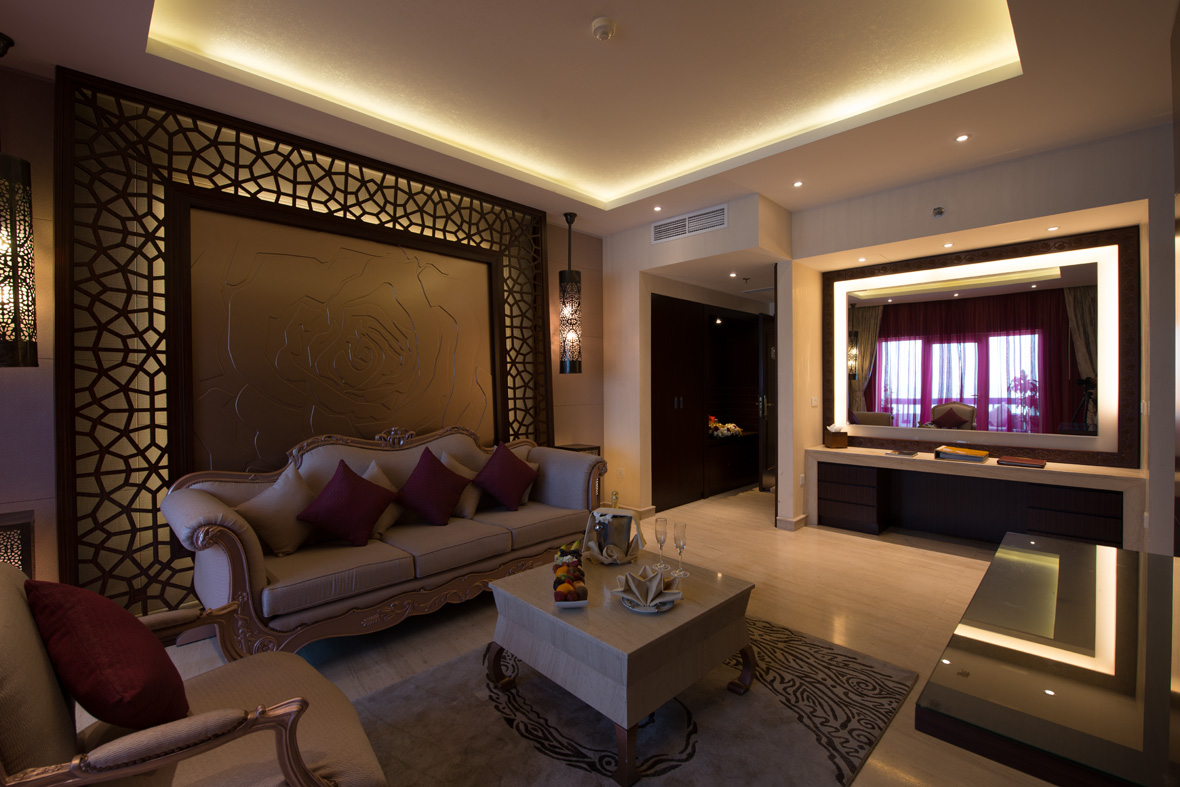
This was an older shoot from about a year ago and it was done for Kempinski Ajman, a resort in the Emirate of Ajman here in the UAE. The actual shot I will take you through is of the living room in the Wedding Suite of the hotel and the reason why I chose this one was because it was particularly challenging. As you can imagine, this is a fairly special room for the hotel so they wanted to have a shot of the living room, showing just about everything there was to show. I did manage to convince the client that we don’t need to show the TV set (TVs are usually the most ugly objects in a room and since they all look the same I try to avoid including them in the photographs), but we were left with a big room, lots of reflections and not many places to hide the lights. The image below is the first shot of the day, showing the room as we found it when we got there.
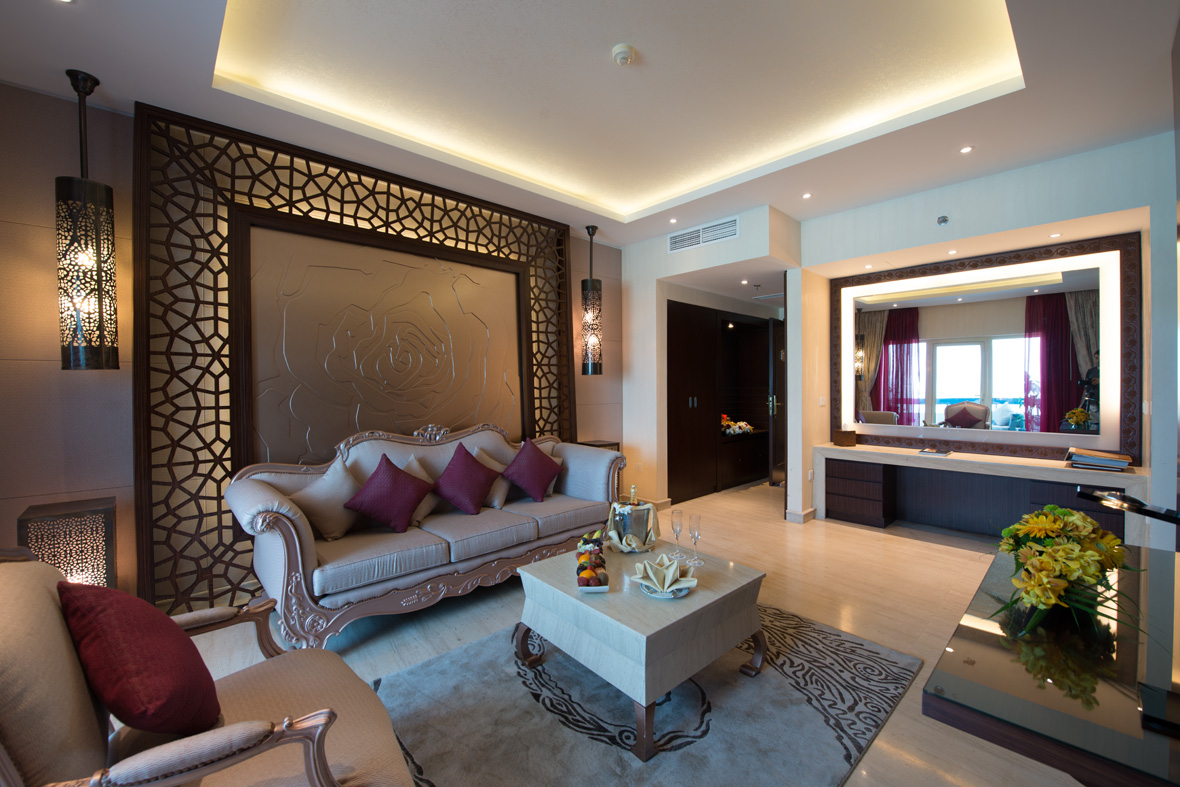
As you can see, the overall light in the room is not too bad (although the window is a bit too blown-out), but there are a lot of reflections that we needed to pay attention to. The first issue was hiding the camera enough to the right so it’s not reflected in the mirror above the desk. Although I initially wanted to shoot this with my 24mm tilt-shift, I couldn’t quite fit everything in so I had to switch to the 14-24mm. Usually that’s a problem because at the normal tripod height, if you’re trying not to distort any of the vertical lines, you end up showing way too much of the ceiling. But in this case, the ceiling has an interesting shape which works quite well in the overall composition. In the next shot, we cleaned up the room a bit, hid the camera in a better place and brought down the exposure to a level where the balcony window was looking good.
Although it looks like we’re going backwards in terms of light, the above exposure is a better one as we now have a base level for the whole room, exposing for the brightest part of the room (the windows). At this point we can start adding some of our own lights, making sure they are not reflected in the myriad of glass surfaces. We started with one main light shot into an umbrella from the right side – that’s where the entrance to the bedroom is, so we had a bit of space to place the light without having it show in the frame. We also experimented with adding a couple of hot lights pointing at the couch and table to bring the area up a bit and give the eyes something to focus on. However at this stage we noticed that not all the lights around the mirror were working so we had to call the maintenance crew.
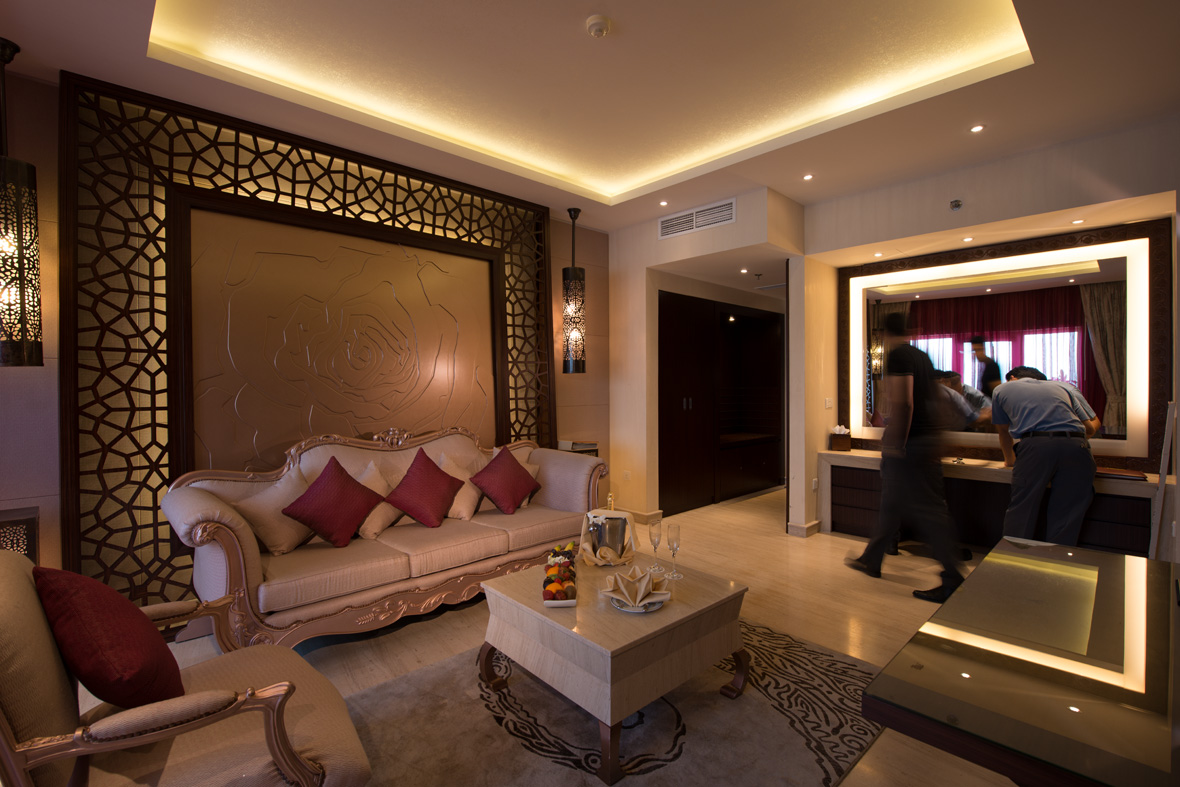
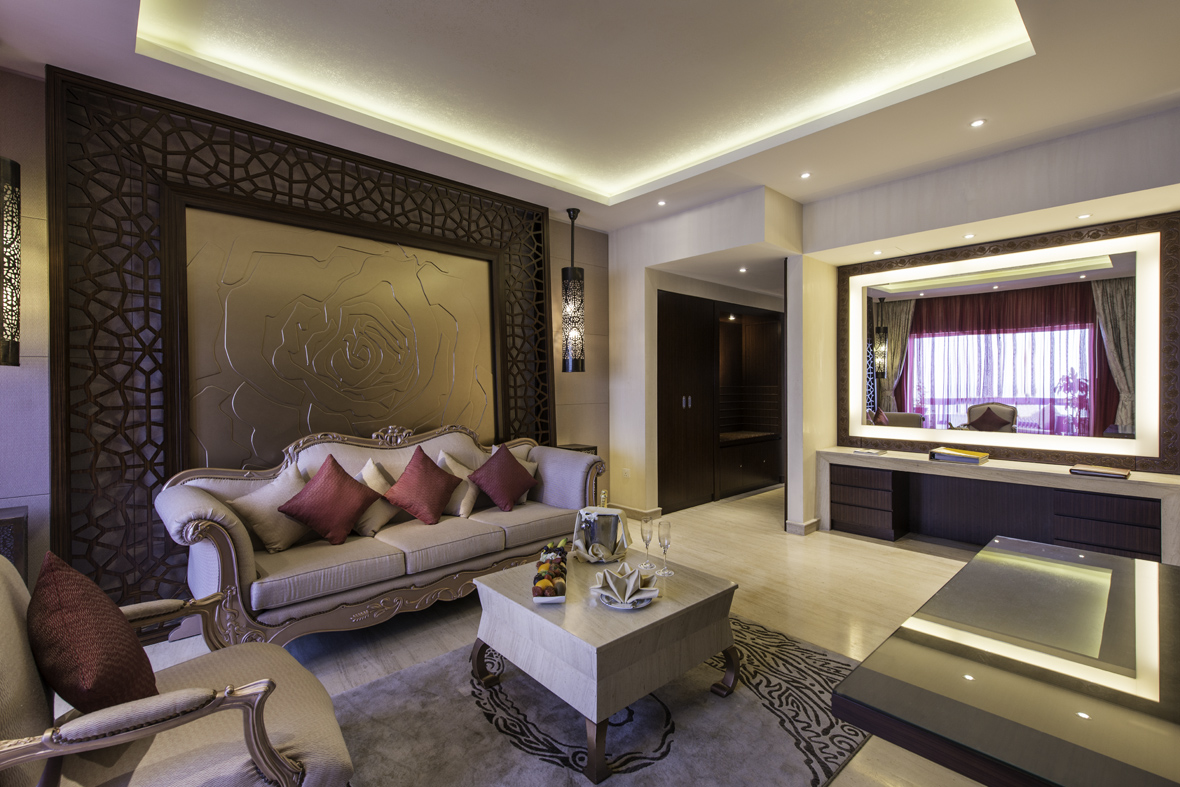
One thing to remember is that everything looks so yellow because all the strobes we added were gelled with CTO gels (1/2 if I remember right) and the white balance was not yet adjusted. Once the mirror lights were fixed, we added another small strobe in the hallway to bring up the dark wooden cabinets, checked again for any stray reflections and took the final shot keeping in mind there will be a bit of retouching needed to get rid of a couple of hot-spots and some distracting sprinklers and AC vents. The final shot is below and those of you paying attention to the details will also notice that we have removed the middle sections in the windows as the client thought the photograph was more “airy” that way.
As always, if you have any questions just post them in the comments and I’ll do my best to answer them.
